

Banana pudding has been a beloved dessert for generations. For many of us, it’s not just a treat, but a nostalgic taste of family gatherings, holiday dinners, and summertime picnics. Whether served in a big dish to share or in individual cups, the combination of creamy pudding, fresh bananas, and crunchy vanilla wafers creates a perfect balance of textures and flavors. Today, we’re taking this classic dessert and transforming it into easy-to-serve banana pudding cups that are perfect for any occasion. These little individual servings make it possible to enjoy the comforting flavors of banana pudding without any mess or fuss.
What is Banana Pudding Cups Recipe?
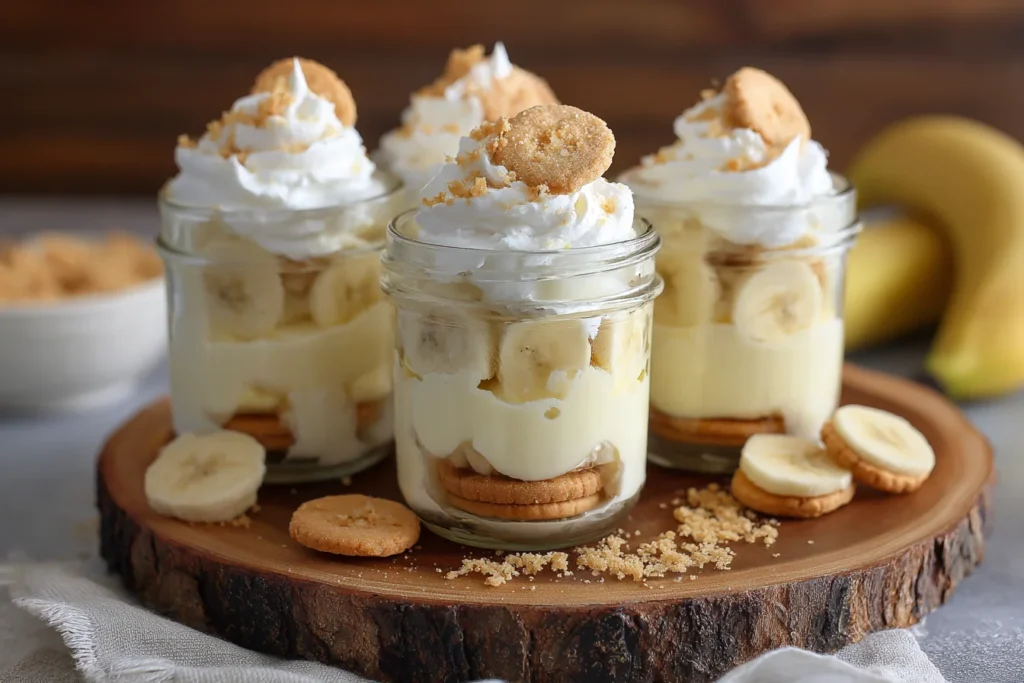
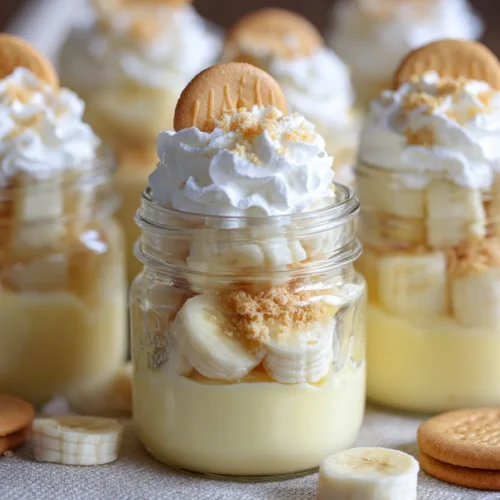
A banana pudding cups recipe is a portable, single-serving version of the beloved Southern dessert, banana pudding. Traditionally, banana pudding is made by layering vanilla wafers, fresh banana slices, and creamy pudding, often topped with meringue or whipped cream. In this recipe, we’re simplifying it and making individual portions that are as adorable as they are delicious. These cups are perfect for parties, potlucks, or even a weeknight treat that’ll make everyone feel special. Think of it as banana pudding’s personal-sized makeover, making it easier to serve and eat—plus, no one will fight over the last spoonful!
Why You’ll Love This Banana Pudding Cups Recipe
There are many reasons why banana pudding cups will quickly become a favorite in your recipe collection. First and foremost, they’re incredibly easy to make, requiring only a handful of ingredients and minimal prep time. Perfect for busy weeknights or last-minute gatherings, these pudding cups come together in a snap and can even be made ahead of time.
Not only is this dessert quick and convenient, but it’s also versatile. The balance of sweetness, creaminess, and a little crunch from the vanilla wafers is irresistible, making it the perfect treat for both kids and adults. Plus, it’s kid-friendly, making it an excellent choice for family get-togethers or a fun afternoon activity with your little ones.
How to Make Banana Pudding Cups Recipe
Making banana pudding cups is easier than you think. Follow these simple instructions for a delightful dessert that’ll leave everyone asking for the recipe.
Ingredients
Step 1:
For the pudding base, you’ll need:
- 2 cups whole milk
- 1 package (3.4 oz) instant vanilla pudding mix
- 1 can (8 oz) whipped topping (like Cool Whip)
- 2 ripe bananas
- 1 box vanilla wafer cookies (about 10 oz)
Step 2: Prepare the Pudding
In a medium-sized bowl, whisk together the instant vanilla pudding mix and whole milk. Follow the instructions on the package and whisk until the pudding thickens, which usually takes about 2 minutes. Once the pudding is set, gently fold in half of the whipped topping. This will add a little extra lightness to the pudding, giving it that perfect creamy texture. Set aside.
Step 3: Slice the Bananas
Peel and slice the bananas into thin, bite-sized rounds. You’ll need about two bananas for this recipe, but feel free to add more if you love extra fruit in your dessert.
Step 4: Assemble the Cups
To assemble, take your serving cups (small mason jars or clear plastic cups work great) and start layering. Begin with a small spoonful of vanilla pudding at the bottom of each cup, then add a layer of banana slices. Follow that with a few vanilla wafer cookies, breaking them into pieces to fit into the cup. Continue layering in this order: pudding, bananas, wafers, and then top with the remaining pudding mixture.
Step 5: Add the Final Touch
Once the cups are filled, top each one with a dollop of the remaining whipped topping. For an extra special touch, crush a few more vanilla wafers and sprinkle the crumbs over the top as a garnish. This adds a bit of crunch to each bite.
Step 6: Chill and Serve
Refrigerate the banana pudding cups for at least 2 hours before serving. This allows the flavors to meld and the pudding to firm up to the perfect consistency.
What to Serve With
These banana pudding cups are delicious on their own, but they also pair beautifully with other Southern-inspired dishes or lighter snacks. Here are a few serving suggestions:
- Barbecue: Banana pudding cups are a great side to complement smoky barbecue.
- Fried chicken: The creamy sweetness of the pudding balances out the crispy, savory chicken.
- Fruit salad: Serve alongside a fresh fruit salad for a lighter option to balance the richness of the pudding.
- Coffee or tea: These cups are the perfect dessert to enjoy with a hot beverage after dinner.
Top Tips
- Make Ahead: Banana pudding cups are great for prepping ahead of time. Make them the night before and let them chill in the fridge overnight for the best flavor.
- Banana Slices: To prevent the bananas from turning brown, consider tossing them in a small bit of lemon juice or making the pudding cups just before serving.
- Texture: If you prefer a bit more crunch, layer extra vanilla wafer cookies between the pudding layers.
- Whipped Cream: If you prefer real whipped cream instead of Cool Whip, it will work just as well. You may need to fold it in gently to keep the texture airy.
Storing and Reheating
Store any leftover banana pudding cups in an airtight container in the refrigerator. They will last for about 2-3 days, though the bananas may start to brown after a day or two. You don’t need to reheat this dessert; it’s best served chilled.
FAQs
Can I make this recipe without vanilla wafer cookies?
Yes, you can substitute vanilla wafer cookies with graham crackers or even crushed shortbread cookies for a different texture and flavor.
How can I make banana pudding cups healthier?
To make this dessert a bit healthier, you can substitute the vanilla pudding mix with a sugar-free version and use light whipped topping. You could also opt for a lower-fat milk.
Can I use bananas that are overly ripe?
Yes, ripe bananas actually work best for banana pudding. Their natural sweetness makes the dessert even more flavorful.
How many servings does this recipe make?
This recipe yields approximately 6-8 individual cups, depending on the size of your cups.
Can I freeze banana pudding cups?
It’s not recommended to freeze banana pudding cups because the texture of the bananas and pudding may change once thawed. The pudding may become watery, and the bananas will soften too much.
Conclusion
Banana pudding cups are a fun, easy, and nostalgic dessert that’s perfect for all ages. Whether you’re making them for a special occasion, a family dinner, or just as a weeknight treat, this recipe is sure to become a favorite. The best part is that it requires no baking, and the individual servings make it easy to share without any mess. With just a few simple ingredients, you can create a dessert that’s creamy, flavorful, and guaranteed to bring smiles all around the table. So, next time you’re craving something sweet, skip the store-bought treats and whip up a batch of these banana pudding cups—your family will thank you!
Banana Pudding Cups – A Delicious, Personal Classic for Any Occasion
Kochutensilien
- 6-8 small serving cups or mason jars
- Mixing bowl and whisk
- Knife and cutting board
Zutaten
- 2 cups whole milk
- 1 package 3.4 oz instant vanilla pudding mix
- 1 can 8 oz whipped topping (like Cool Whip)
- 2 ripe bananas
- 1 box vanilla wafer cookies about 10 oz
Anleitungen
- Prepare the Pudding:
- In a medium-sized bowl, whisk together the instant vanilla pudding mix and whole milk. Follow the package instructions and whisk until the pudding thickens (usually about 2 minutes). Once the pudding is set, gently fold in half of the whipped topping for added creaminess.
- Slice the Bananas:
- Peel and slice the bananas into thin, bite-sized rounds.
- Assemble the Cups:
- In each serving cup, start with a spoonful of pudding at the bottom. Add a layer of banana slices, followed by a few broken vanilla wafer cookies. Continue layering in this order: pudding, bananas, wafers, and top with the remaining pudding mixture.
- Finish and Chill:
- Top each cup with the remaining whipped topping and sprinkle with crushed vanilla wafers. Refrigerate the cups for at least 2 hours to allow the flavors to meld.
- Serve:
- Once chilled, remove the cups from the fridge and serve!