

Eine selbstgemachte Currywurst mit der richtigen Soße ist kaum zu toppen, wenn es um pures Wohlfühlen geht. Currywurst ist für mich mehr als nur ein schnelles Mittagessen; es verkörpert ein Stück Kindheit, mit Erinnerungen an den Wochenmarktduft und dem wohltuenden Gefühl, wenn die ganze Familie um den Küchentisch versammelt ist. Diese hausgemachte Currywurst-Soße bringt den Imbissklassiker direkt nach Hause – frisch, voller Geschmack und absolut kinderfreundlich. Obendrein geht die Zubereitung in Windeseile, weshalb auch ein hektischer Alltag kein Hindernis ist.
Was ist Currywurst Soße?
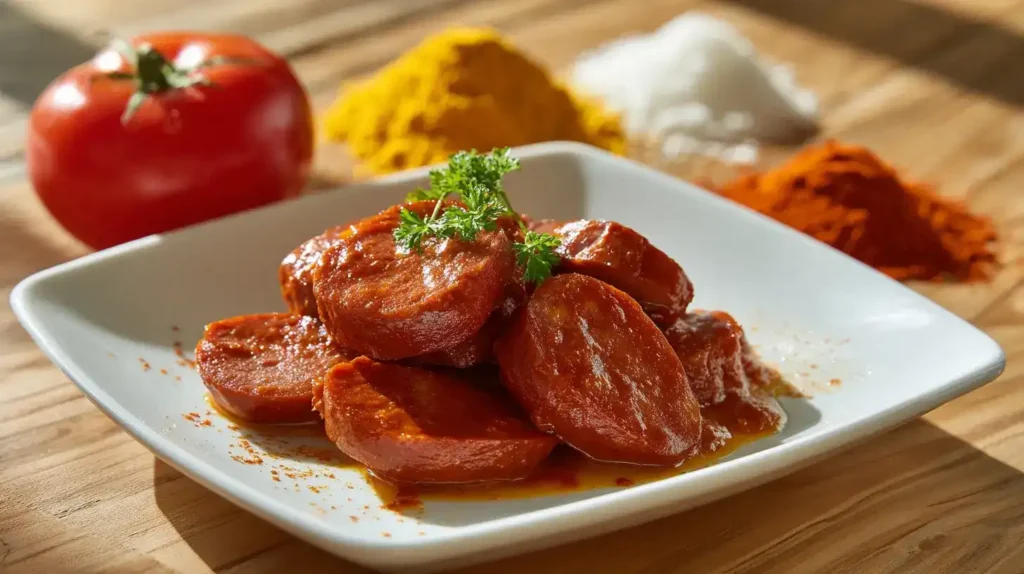
Die herzhaft-süße Currywurst Soße wird über gebratene Bratwürste gegossen. Die Mischung aus Tomaten, Gewürzen, einer leichten Süße und einem kleinen Fruchtakzent – in diesem Fall Orangensaft – verleiht ihr diesen einzigartigen Geschmack. Traditionell wird sie mit Currypulver gewürzt und kann je nach Vorliebe für Schärfe mild oder pikant sein.
Diese Soße ist wahre ein Allrounder: Sie schmeckt nicht nur hervorragend zu Bratwürsten, sondern auch zu Kartoffelpüree, Pommes oder sogar als Dip für Snacks. Sie ist in etwa 20 Minuten mit wenigen Zutaten zubereitet, hält sich mehrere Tage im Kühlschrank und ist perfekt für Kinder, Familienessen oder schnelle Gerichte unter der Woche.
Warum Sie es lieben werden
- Schnell & einfach: In nur 20 Minuten eine Soße zaubern, die jedem Imbiss geschmacklich überlegen ist.
- Für Kinder geeignet: Sie können die Schärfe einfach so einstellen, dass sie für die Kleinen passt.
- Frisch & voller Geschmack: Keine Konservierungsstoffe, sondern nur beste Zutaten wie passierten Tomaten und frischem Orangensaft.
- Ideal für Reste: Die Soße kann gut im Voraus zubereitet werden und bleibt mehrere Tage im Kühlschrank frisch.
- Flexibel: Ob mild, scharf, fruchtig oder cremig – die Soße kann ganz nach Wunsch angepasst werden.
Zutaten
Für 6 Portionen Currywurst Soße benötigen Sie:
- 500 g passierte Tomaten
- 1 Schalotte
- 30 g Tomatenmark
- 1,5 EL brauner Zucker
- 75 ml Orangensaft (frisch gepresst oder Direktsaft)
- ½ Peperoni
- 3 TL Paprikapulver (edelsüß)
- 2 TL Currypulver (plus extra zum Bestreuen)
- 1 Zimtstange (optional)
- 2 EL neutrales Pflanzenöl
- Salz, schwarzer Pfeffer
Zubereitung
Schritt 1: Zutaten vorbereiten
Schälen Sie die Schalotte und würfeln Sie sie fein. Waschen Sie die Peperoni, entfernen Sie die Kerne (lassen Sie sie drin, wenn Sie es schärfer mögen) und schneiden Sie sie ebenfalls klein.
Schritt 2: Kurz anbraten
In einem Topf das Öl erhitzen und die Schalotten- sowie Peperoniwürfel bei mittlerer Hitze so lange dünsten, bis die Schalotten glasig sind.
Schritt 3: Gewürze und Tomatenmark einrühren
Fügen Sie das Tomatenmark, den braunen Zucker, Paprika, Currypulver sowie eine Prise Salz und Pfeffer hinzu. Rühren Sie alles für etwa 1 Minute kurz an, bis es leicht angeröstet ist, damit sich die Aromen entfalten.
Schritt 4: Mit Flüssigkeit ablöschen & sanft köcheln lassen
Fügen Sie den Orangensaft hinzu und mischen Sie alles gründlich. Dann die passierten Tomaten und die Zimtstange hinzufügen. Bei geringer Hitze 15 bis 20 Minuten köcheln lassen, bis die Soße leicht eindickt.
Schritt 5: Nachwürzen & Anrichten
Die Zimtstange entfernen und die Soße nach Ihrem Geschmack mit Salz, Pfeffer und Currypulver würzen. Über gebratene, in Scheiben geschnittene Bratwürste können Sie die Soße gießen und sie optional mit weiterem Currypulver bestreuen.
Darf serviert werden
Currywurst kommt am besten mit traditionellen Beilagen wie Pommes frites, Kartoffelsalat oder Brötchen. Bei Kindern können Sie die Schärfe anpassen und es mit einem Klecks Ketchup servieren. Ein frischer Blattsalat oder Gurkensalat ist das perfekte leichtes und ausgewogenes Gericht.
Top-Tipps
- Um die Soße cremiger zu machen: Einen Schuss Sahne oder Crème fraîche einrühren.
- Für einen fruchtigen Akzent: Ein kleiner Schuss Apfelsaft oder etwas Mango-Chutney kann der Soße das gewisse Etwas verleihen.
- Schärfe justieren: Kerne der Peperoni drin lassen für mehr Feuer oder komplett entfernen für eine milde Variante.
- Resteverwertung: Die Soße eignet sich auch hervorragend für Nudeln oder Reis.
Aufbewahren und Aufwärmen
In einem luftdichten Behälter ist die Soße bis zu 5 Tage im Kühlschrank haltbar. Zum Aufwärmen einfach in einem kleinen Topf erhitzen; falls sie zu dick ist, kannst du sie eventuell mit einem Schuss Wasser oder Orangensaft verdünnen.
FAQs
Wie scharf ist die Soße der Currywurst?
Die Schärfe ist einfach zu steuern: Entkernen für milde Peperoni oder drin lassen für mehr Schärfe.
Ist es möglich, die Soße einzufrieren?
Ja, die Soße kann man gut einfrieren. Es ist am besten, in kleinen Behältern portionsweise einzufrieren und bei Bedarf zu tauen.
Ist die Soße für Kinder geeignet?
Oh, absolutely! Reduziere einfach die Schärfe, und schon können auch die Kleinen mitspielen.
Ist es möglich, die Soße vegan zu machen?
Ja, sämtliche Zutaten sind pflanzlich. Es ist ganz einfach, Bratwürste durch vegane Alternativen zu ersetzen.
Fazit
Diese Currywurst-Soße ist ein wahres Allround-Talent: Sie ist schnell zubereitet, schmeckt lecker, ist kinderfreundlich und eignet sich für die ganze Familie. Sei es als entspanntes Abendessen, Snack zwischendurch oder als Meal-Prep für die Woche – sie punktet mit ihrem guten Geschmack und der Vielseitigkeit. Versuchen Sie es, spielen Sie mit Gewürzen und erleben Sie das echte Imbiss-Feeling in Ihrem Zuhause. Viel Spaß beim Essen!
Braucht deine Küche mehr Inspiration von mir? Schau dir meine hausgemachten Knusprige Pommes selber machen – im Ofen, unkomplizierten Bärlauchbutter selber machen und köstlichen Bananenbrot – ganz einfach selbermachen an – sie sind alle voller Geschmack und einfach zu machen.

Currywurst Soße selber machen – Einfaches Rezept für den perfekten Imbissklassiker
Kochutensilien
- Kochtopf oder kleiner Topf
- Schneidebrett
- Kochlöffel
Zutaten
- 500 g passierte Tomaten
- 1 Schalotte
- 30 g Tomatenmark
- 1,5 EL brauner Zucker
- 75 ml Orangensaft frisch gepresst oder 100 % Direktsaft
- ½ Peperoni
- 3 TL Paprikapulver edelsüß
- 2 TL Currypulver plus extra zum Bestreuen
- 1 Zimtstange optional
- 2 EL neutrales Pflanzenöl z.B. Sonnenblumenöl
- Salz
- Schwarzer Pfeffer aus der Mühle
Anleitungen
- Schalotte schälen und in feine Würfel schneiden, Peperoni waschen, entkernen und klein hacken.
- Erhitze das Öl im Topf und dünste die Schalotten- sowie Peperoniwürfel darin glasig an.
- Tomatenmark, Zucker, Paprika, Currypulver, Salz und Pfeffer dazugeben und 1 Minute unter Rühren leicht anrösten.
- Orangensaft hinzufügen und alles gut vermischen.
- Passierte Tomaten und die Zimtstange hinzufügen, dann bei schwacher Hitze 15 bis 20 Minuten köcheln lassen.
- Zimtstange herausnehmen, Soße probieren und nachwürzen. Gebratene, in Scheiben geschnittene Bratwürste und nach Belieben mit Currypulver garnieren.